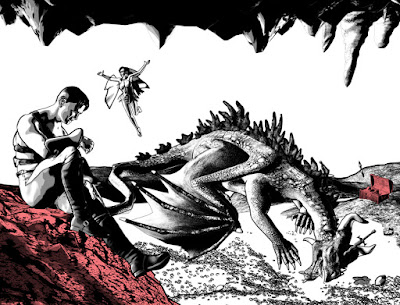
This is what I came up with:
 |
| © 2020 Mike Mitchell |
Any thoughts on whether this is a decent representation of my figure work?
Comics, 3D art, Clip Studio Paint, Midjourney, Tech Tips and other cool stuff from Mike Mitchell's geek-o-sphere!
 |
| © 2020 Mike Mitchell |
 |
| © 2020 Mike Mitchell |
 |
| © 2019 Mike Mitchell |
 |
| © 2019 Mike Mitchell |
 |
| © 2019 Mike Mitchell |
 |
| © 2019 Mike Mitchell |
 |
| Ultra flies to the rescue! © 2019 Mike Mitchell |
 |
| Detail from Days Gone, page 5 © 2019 Mike Mitchell |
 |
| Days Gone, pages 4 & 5 © 2019 Mike Mitchell |
 |
| Arton Character Design (not used) © 2019 Mike Mitchell |
 |
| M4 Face Texture Map (click to blow it up so you can see the eyebrow details) |
 |
| Days Gone, page 5, panels 1 & 2 © 2019 Mike Mitchell |
 |
| I found this online at a discussion group. You can find it here: https://community.hivewire3d.com/threads/pulling-back-the-drapes-the-cloth-room.368/page-2 |
 |
| My first attempt at using a dynamic harness. Not bad, but it looks too thin to be leather. Definitely needs some more work. |
 |
| Render pasted into the frame in Manga Studio 5 EX (aka Clip Studio Paint Pro). |
 |
| Red background and blue frame added in Photoshop to make it easier to see the render's dimensions. |
 |
| A few quick lines are all it takes to fix this problem. That makes it not worth the effort to fix the geometry in Poser. (Potential edit shown in blue line) |
 |
| Click to expand image. Open the Hierarchy Editor under the Window Menu (gold highlight). Click on the eyeball icon for each item to make it invisible. |
 |
| I always lock my main camera, so if you didn't do that in a previous step, you can skip these instructions/advice. |
 |
| Enter the new dimensions. Make sure the "Render to Exact Resolution" option is selected. Make sure the "Constrain aspect ratio" is NOT selected. |
 |
| With the render dimensions set, I now have a tall, narrow camera view that is the same shape and size as my final panel dimensions. |
 |
| This is almost right, but his forearm and bracer are huge. There are also problems with the line thicknesses. This means I have different values for different body parts in the Materials Room. |
 |
| Click to see the scale adjustments I made for the bracer. Also note the thinner outlines on his shoulders. |
 |
| I edited the rulers and provided the emphasis to make this easier to read online. |
 |
| Before you start drawing the ruler, select the desired units. |
 |
| Moon Wolf © 2018 Mike Mitchell Just a quickie illustration to get back into the swing of things before diving into the next two pages of Days Gone. |
 |
| Click to see it in more detail. |
 |
| Here's a look at the basic scene that will take up pages 2 and 3. I marked two landmarks in the scene: 1. Hero Rock and 2. Treasure Chest. |
 |
| This is an oblique view, looking down at the scene. In some cases, I have scaled objects to increase their size so they would look better from a distance. The ceiling is hidden in this view. |
 |
| © 2018 Mike Mitchell |
 |
| Conan the Barbarian © 2018 Marvel Comics Image © 2018 Mike Mitchell |