I was originally going to end this series here, but decided I didn't want to end it with 13 parts. I'm not superstitious, but since some people are, I decided to add another quick lesson. Using the same techniques as before (right up to Steps 11 and 12, where we applied the tone and color wash), I'm going to show you how to apply a quick sketch look to your image, using things that ship with Manga Studio. In other words, I'm going to cheat to use an existing sketched image that came with the program and add it to the "Gray" area we defined for shading.
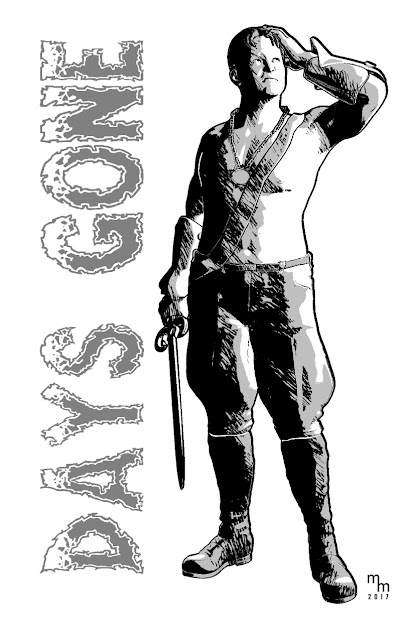 |
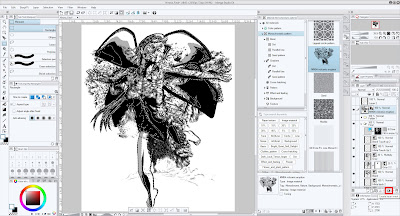
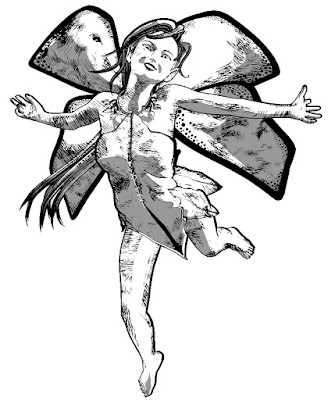
Using a background image that ships with Manga Studio,
I added it to this image and quickly gave it a sketch look. |
Here's another example of the same technique, but on a different image.
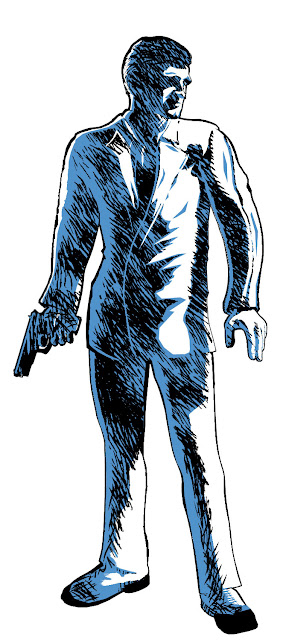 |
Same technique as above: This look
was achieved very quickly. |
Now, you might be thinking, why bother cheating? If you want a sketch look, just sketch it. And I agree. For the best results, you really should just sketch it yourself. But sometimes you're in a hurry and you just want to see quick results. So, that's why I sometimes fall back on this technique to get a jump start on a sketched look.
As before, follow the Step-by-Step instructions, which are almost identical to what they were last time (and the time before that). To save time and space, I am not including all of the screenshots – please refer to the older posts if you need more detail, with the following difference.
Short version of what we're going to do: Find a background material that has lots of random sketch lines and then overlay it on the image, using the Gray layer as a mask.
Step-by-Step
- In your Materials Panel, select Monchromatic Pattern > MM04-volcanic eruption
- Drag the MM04-volcanic eruption to your main drawing area. Then drop it; it will create a new layer. Make sure the layer is above the others (I usually sandwich it between the Black Touch-Up layer and the various render layers). Check out the details below.
- With the layers in the correct order, select the "Gray Layer" from the Layers Panel.
- From the Selection menu, choose the "Select Color Gamut..." option.
- The Select Color Gamut dialogue box will open. The cursor will also change to an eyedropper. Pick a color on the screen that you want (in this case, black or gray). You can use the settings in the control to choose only from the active ("Gray") layer, or all visible layers. You can also add or subtract from your selection.
- Your region will be selected (you'll see the flashing lasso effect around the selected area). Click on the layer with the MM04-volcanic eruption material.
- At the very bottom of the layers panel, click on the "Create Layer Mask" icon.
- Abruptly, the majority of the "mess" will vanish, and it will only be visible inside the areas selected and defined by the Gray layer.
- In the Layers panel, you need to click on the small checkmark that links the layer mask's movement to the material. See image and comments below.
- Select the Operation Tool
- Use it to increase the size of the material (make sure the mask itself doesn't move). You will need to decrease the size of the image so you have more room to work with. By default, this tool should maintain aspect ratio (which is something you want, as it will make the lines look better when they get bigger).
- Move the material around, resizing as you want, until it looks like something you like. Be mindful not to make the sketched lines too big or too small.
- Because the Gray layer has sharp edges, some of the sketched lines will appear clipped. You may also not have lines in some spots where you want them. In this case, add some extra lines on a new layer. And don't forget you can combine the sketch with other layers and effects.
|
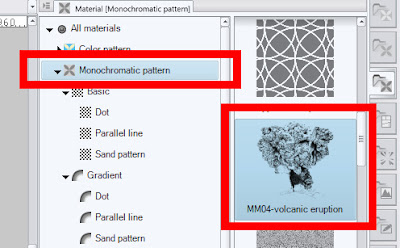 |
| 1. In the Materials Panel, select Monchromatic Pattern > MM04-volcanic eruption |
 |
2. MM04-volcanic eruption
This material is included with Manga Studio (Clip Studio Paint) |
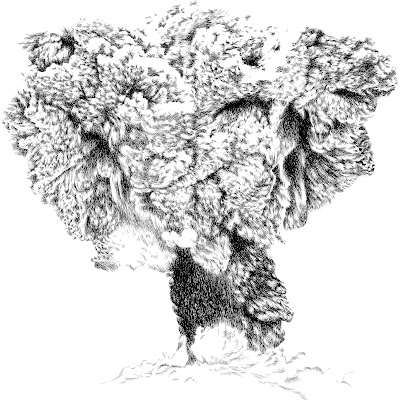
Now, you might be thinking, "What's so cool about this pattern?" Well, let's take a look at a close up of what's going on inside those swirls. Just take a look at all those random sketched lines. And they flow in multiple directions. This is a great place to get some sketchy effects for a quick illustration.
 |
2. Detail from MM04-volcanic eruption
This thing can be blown up HUGE to get these cool, almost random sketch lines. |
 |
4. Don't be afraid to play around with the settings
in the Select Color Gamut dialogue box.
|
 |
6. While working at this stage, you will have a pretty horrible mess
on your screen. Ignore it for now. |
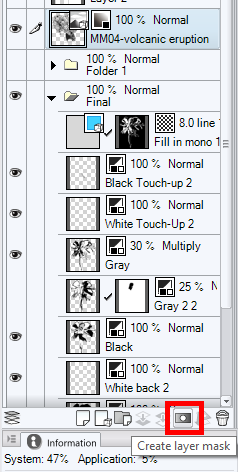 |
7. With the MM04-volcanic eruption layer selected,
click on the "Create layer mask" icon at the bottom
of the Layers Panel |
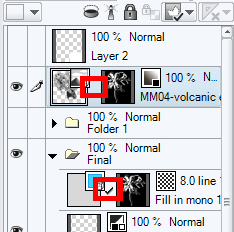 |
| 9. Unlink the Material from the Mask. |
If you don't understand Layer Masks, this step may see weird. There are LOTS of good videos out there (most about Photoshop, but principles still apply here), so you should go watch some to decipher what I'm talking about. There is a small checkmark between the Material and the layer mask. You want to click on it so that it goes away. Note in the image above: In the screenshot above, I'm showing one layer with and one layer without. We are doing this so we can manipulate the material (we need to make it MUCH bigger, and move it around a lot) without moving the mask.
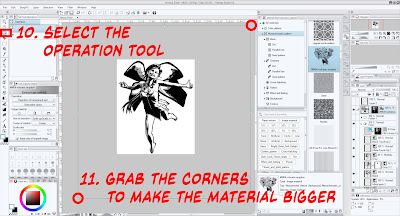 |
10. Select the Operation Tool
11. Shrink the image and then grab the corners to make the material bigger. |
 |
12. Keep moving the material around
until you see something you like. |
Now, to be honest, this image is not the best example of this style. I think the two I posted above look much better than the fairy does. So, I hid the black layer, brought in another render and dramatically altered the region of the Gray layer to create something more extreme. Now, I'm not really happy with this, either, but I did want you to see how this can look combined with other looks and effects.
 |
| 13. Experiment until you get something you like. |
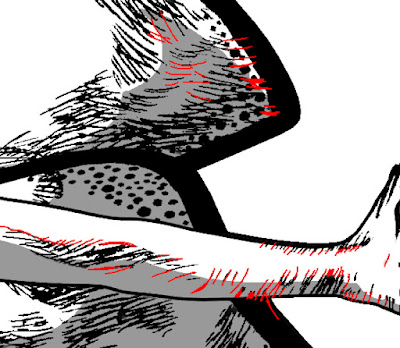 |
| 13. Add extra lines (shown here in red) to fill in gaps or to break up hard edges. |
And remember, you can combine all of these effects to create a look you like. Here's a detail from one of the few times I have used ALL THREE finishes in a single illustration:
- Tone
- Color Wash
- Sketched Effect
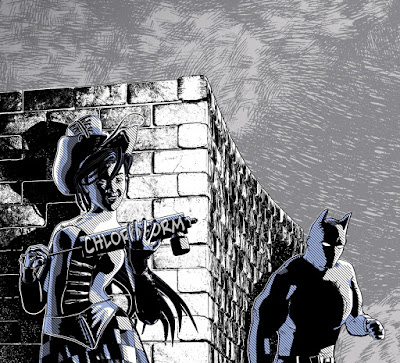 |
| Mix-n-match effects and finishes to get the look you want. |
The key is always to use moderation, and to remember your sense of scale so that the various treatments blend together. I know it might look a bit intense in the image above, but this is a detail from a two-page illustration, so when seen as a whole, it really doesn't seem that overpowering.
NEXT TIME: Saving Your Final Image


No comments:
Post a Comment