 |
| Page Template from Ka-blam.com © 2017 Ka-Blam |
So, why do I work with such huge renders? That's because I work for print. And the bare minimum for a good printed image is 300 dpi (that's dots per inch). The standard comic book page is about 7 inches wide by 10 inches tall, so if I'm creating a full-bleed image to be printed at Ka-Blam.com needs to be 2,100 pixels wide by 3,000 pixels tall. And this is if you've framed the image exactly in the render window.
Grekoprinting-comixwellspring.com (the folks I usually use because they have a faster turnaround than Ka-Blam) have a base page size of 2063 x 3150 pixels.
Since I'm not usually that precise, I usually render larger and manipulate it as needed. Additionally, as you'll see when we get into the clean-up phase, you'll want the extra pixels in Manga Studio because it lets you set up more variation in the width of your lines (by that, I mean your lines will be able to go from thin to thick and thin again). You'll see what I mean when we get to that.
Render Settings are available from Render option in the Menu Bar (or press CTRL+Y). You'll see the panel, and then you can make the following modifications:
With the Render Panel open:
- Select the Render Settings Tab.
- Select the Preview tab (on the second row).
- Make sure "Enable OpenGL Mip Maps" is checked.
- Increase the "Preview Resolution" slider to at least 4096 (Note: Unless your scene has LOTS of tiny detail, I have not seen significant improvement by going up to 8192 or 16384).
- If you need to adjust the Render Dimensions, you can click on this button.
Once you have the settings you want, you can click on the "Render Now (Preview) button in the lower-right of the window. NOTE: Once you have the settings down, you can render subsequent images by pressing CTRL+R.
Preview Texture Resolution
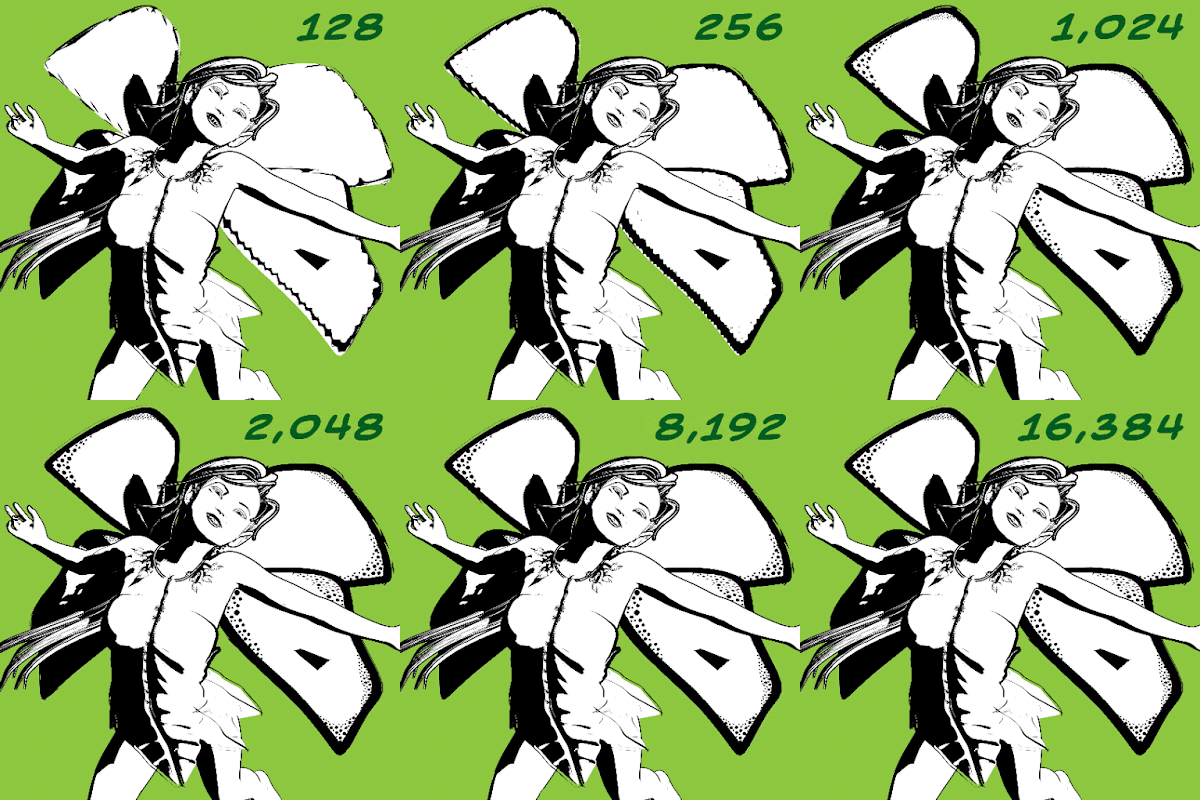
This setting drives how much detail is allotted to your textures. The bigger the number, the more detail (and potentially longer render times). Remember, if you're working in b&w, the hit to your processor will be minimal. While creating each of the images in the animated GIF below, I didn't even notice a difference between 128k and 8MB.
 |
| Detail is in the eye of the beholder. You can see that the texture "tops off" around the 4,096 mark. |
NEXT TIME: Creating Render Passes

Enjoying this series. Hoping I get an Amazon or Chapters gift card as a Christmas gift as I really like your recommendations in art books..
ReplyDeleteThanks! Reading books like those I mentioned really inspire me to try harder. I also like to immerse myself in the work of a particular artist. Recently I've been really getting into Alex Toth (as you can probably see from my use of deep shadows) and Will Eisner (more for shading, composition and using body language to "sell" the character to the reader.
ReplyDelete